Zylo Solar Zylo Solar

How to Set Up a Solar Water Pump for Irrigation

Time:2026-09-08 Author:Henry
0%

Learning how to set up a solar water pump for irrigation begins with the field, not the pump box. A reliable system must match crop demand, well depth, sunlight, pipe length, and daily storage. One small mistake can leave dry beds at noon. Too much water can also damage soil and waste energy.

Solar water-pumping specialist Mark Hankins states, “Solar pumping works best when water demand, storage, and sunlight are designed together.” This practical principle guides the discussion ahead. The article will examine how to measure the water source, estimate irrigation needs, select panels, size the pump, and install safe controls. It will also explain why elevated tanks often improve reliability during cloudy periods.

Start with accurate measurements.

Record the static water level and pumping depth. Check the distance between the water source and the irrigation area. Note seasonal sunlight changes, because winter output may be lower than expected. A pump that performs well in a bright test can struggle during dusty or cloudy weeks.

This guide focuses on real installation decisions. It considers pipe friction, filtration, dry-run protection, wiring, mounting angles, and routine maintenance. It will not treat solar pumping as a universal solution. Some sites need batteries, larger storage, or a backup power source. Others need a smaller pump and better water scheduling.

The process may feel technical. It becomes clearer when each number has a purpose. With careful planning, farmers can reduce fuel use, protect water resources, and build an irrigation system that remains useful beyond the first sunny season.
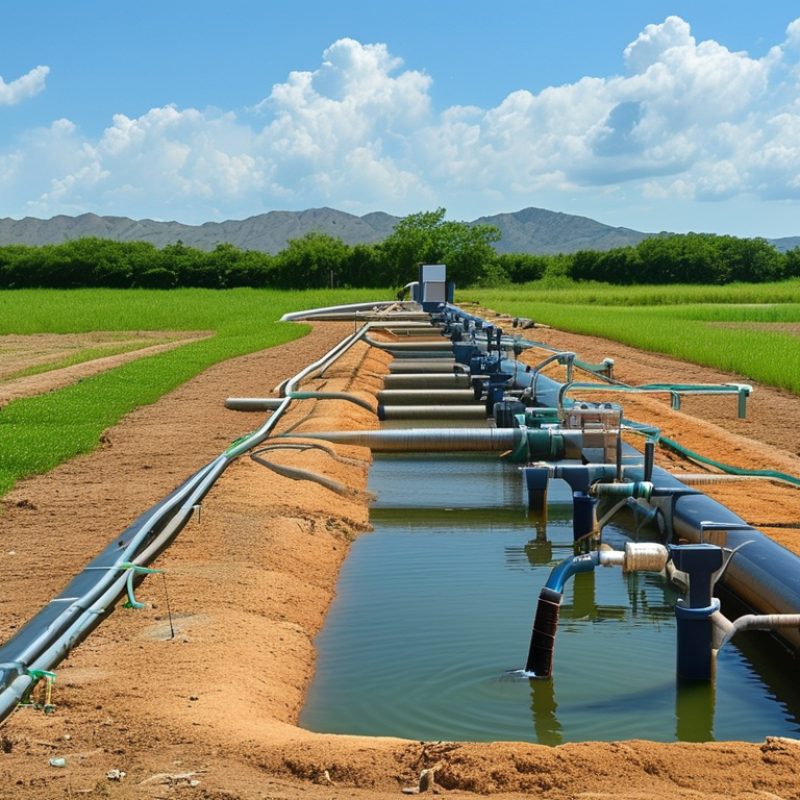
How to Set Up a Solar Water Pump for Irrigation

Assess the Site, Water Source, and Irrigation Requirements

How to Set Up a Solar Water Pump for Irrigation

Assess the Site, Water Source, and Irrigation Requirements

Start with a careful site survey, not the pump catalogue. Record the available sunlight from morning to late afternoon. Note seasonal shade from trees, buildings, or temporary structures. A sunny roof in May may be shaded in December. That difference can reduce daily pumping time.

Measure the distance between the water source, pump, storage tank, and fields. Include elevation changes, because lifting water requires significant energy. Check the well’s static water level and observe its recovery after pumping. For a pond or canal, inspect sediment, algae, and floating debris. A simple flow test during the dry season is valuable. The water source may look reliable after heavy rain, but conditions change. Local water authorities may also require permits or usage limits.

Match the system to real irrigation demand. Estimate the crop area, soil type, watering schedule, and seasonal rainfall. Sandy soil may need smaller, more frequent applications, while clay soil holds water longer. Calculate required flow in liters per minute and total daily volume. Include pipe length, bends, filters, and emitters in the pressure estimate. Undersized pipes can waste power through friction. Oversizing the pump can increase cost and draw water faster than the source recovers. I have seen planning focus too heavily on peak demand. A smaller test section can reveal weak assumptions before full installation. Keep records of water levels, sunshine, and irrigation output during the first weeks.

Choose Compatible Solar Pumping and Power Equipment

How to Set Up a Solar Water Pump for Irrigation

Choose compatible solar pumping and power equipment before digging the borehole or mounting panels. Start with crop demand, water source depth, daily flow, and total dynamic head. Total head includes elevation, pipe friction, and pressure at the field. A pump rated only by horsepower may fail under real conditions. Match the pump curve to the required flow and head.

The controller, motor, and panels must share compatible voltage and current ranges. A variable-speed solar controller with maximum power point tracking can adjust output during passing clouds. Confirm whether the motor uses direct current or alternating current. An inverter may be necessary, but it adds conversion losses. Include dry-run protection, overload protection, surge protection, and a properly sized disconnect.

Small details matter. A long, narrow pipe wastes energy. Oversized storage can cost more than useful panel capacity. The IRENA Renewable Power Generation Costs report states that utility-scale solar photovoltaic electricity costs fell about 90% between 2010 and 2023. That trend supports solar irrigation, but equipment matching still determines field performance. FAO AQUASTAT reports that agriculture accounts for roughly 70% of global freshwater withdrawals, making efficient delivery essential. I would measure midday flow and early-morning flow separately. My first estimate might be wrong. Recheck it after installation, especially when dust, heat, or seasonal water levels change.

Install the Pump, Solar Array, Pipes, and Control System

A solar irrigation pump works best when its flow, lift, and daily water demand match the site. Before digging, measure the distance from the water source to the highest outlet. Check the well or tank depth during dry conditions. I once placed a pump too close to muddy water, and the filter clogged within days. Keep the intake above settled sediment, with a screened foot valve fitted securely.

Install the solar array on a strong frame facing the sun, away from trees and seasonal shadows. Leave space around each panel for cleaning and inspection. Use weather-resistant cables, proper grounding, and a protected disconnect switch. Electrical connections should follow local requirements and be checked by a qualified professional. Small wiring mistakes can reduce output or create serious hazards.

Lay the main pipe with as few sharp bends as possible. A slightly larger pipe often reduces friction and improves delivery. Add a check valve, filter, pressure gauge, and drain point where maintenance is convenient. The control system should include a dry-run sensor, overload protection, and a float switch for the storage tank.

Keep controls inside a sealed enclosure above flood level. Test the pump at midday, then inspect flow, pressure, leaks, and cable temperature. Do not trust one successful test. Seasonal shadows and falling tank levels may expose weak design choices later.

Configure Water Flow, Storage, and Irrigation Zones

How to Set Up a Solar Water Pump for Irrigation

Begin with measured demand, not panel size. The FAO-56 Irrigation and Drainage Paper states that one millimeter of water over one hectare equals 10 cubic meters. Calculate crop demand, then divide it by available pumping hours. Add friction losses, elevation, and a modest safety margin. A flow meter at the pump outlet exposes mistakes quickly. My early layouts were too optimistic about cloudy afternoons.

Use a raised storage tank when sunlight and irrigation timing do not match. A one-day buffer often works, but storage depends on crop sensitivity and weather risk. Install a float valve, overflow route, isolation valve, and visible level gauge.

Keep the tank shaded when practical. Stored water can warm significantly in direct sun. The tank should sit high enough to provide useful pressure, or include a pressure-boosting stage.

Divide the field into irrigation zones with similar elevation and crop demand. Smaller zones reduce pressure variation and let the pump operate closer to its intended flow. Drip systems commonly need filtration, pressure regulation, and regular flushing. Agriculture represents roughly 70% of global freshwater withdrawals, according to the FAO AQUASTAT database and the UN World Water Development Report 2024. Efficiency matters.

Set each zone with a timer, but check the soil afterward. Timers can be wrong. Place moisture sensors near active roots, not beside emitters. Record flow, tank level, and solar conditions for two weeks. Then adjust zone duration, spacing, or storage volume. The untidy data often reveals the real design problem.

Test the System and Plan Routine Maintenance

How to Set Up a Solar Water Pump for Irrigation

Test the system under real field conditions, not only under bright sunlight. Measure panel voltage, pump current, water flow, and pressure at midday. Record the readings in a notebook. Compare them with the pump’s rated values. A weak flow may indicate shading, blocked filters, air in the pipe, or excessive lift. Check the water reaching the farthest irrigation line. Uneven delivery often reveals hidden pressure loss.

Schedule a short inspection every month. Clean dust from panels with soft water and inspect cables for cracking, loose connections, or animal damage. Remove sediment from the intake filter before it restricts flow. Every three months, check pipe joints, valves, mounting bolts, and dry-run protection. FAO reports that agriculture accounts for about 70% of global freshwater withdrawals, so wasted pumping water deserves attention. NREL’s photovoltaic degradation research commonly reports about 0.5% output loss per year. Small declines are normal, but sudden losses require investigation.

Tips: Keep a simple log. Note weather, pumping hours, flow rate, and filter condition. Test after a cloudy day, too. My first inspection would not rely on one perfect reading. Seasonal groundwater changes, weeds, and dust can alter performance. Plan a spare-filter kit, but avoid replacing working parts without evidence. Use qualified technicians for electrical faults and follow local safety requirements.

FAQS

: What information is needed before installing a solar irrigation pump?

: Measure crop demand, water depth, daily flow, elevation, pipe length, and field pressure. Horsepower alone is not enough. Match the pump curve to actual flow and total head.

How should the pump, controller, motor, and panels be matched?

Confirm compatible voltage and current ranges. Check whether the motor uses direct or alternating current. A suitable controller can adjust output during passing clouds. An inverter may add conversion losses.

How much water does a crop area require?

One millimeter over one hectare equals 10 cubic meters of water. Calculate daily demand, then divide it by available pumping hours. Add friction losses, elevation, and a modest safety margin. My first estimate may be wrong.

Is a storage tank useful for solar irrigation?

Yes, especially when sunlight and irrigation times do not match. A one-day buffer may work, but weather and crop sensitivity matter. Install a float valve, overflow route, isolation valve, and level gauge. Keep the tank shaded when practical.

How should irrigation zones be arranged?

Group areas with similar elevation and crop demand. Smaller zones reduce pressure differences. Drip systems usually need filtration, pressure control, and regular flushing. Check the soil after each timed cycle.

Where should moisture sensors be installed?

Place them near active roots, away from emitters. Record flow, tank level, soil condition, and sunlight for two weeks. Messy data can expose the real design problem.

What should be tested after installation?

Test during real field conditions, including cloudy periods. Measure panel voltage, pump current, water flow, and pressure around midday. Check the farthest irrigation line. Weak flow may come from shading, blocked filters, air, or excessive lift.

How often does the system need maintenance?

Inspect it briefly each month. Clean dusty panels with soft water. Check cables, filters, pipe joints, valves, mounting bolts, and protection devices. Keep spare filters available, but do not replace working parts without evidence.

What should be recorded during routine operation?

Keep a simple log of weather, pumping hours, flow rate, tank level, and filter condition. Compare seasonal readings. Groundwater levels, weeds, heat, and dust can change performance. One perfect reading proves very little.

Conclusion

This guide explains how to set up a solar water pump for irrigation by starting with a careful assessment of the site, water source, soil conditions, elevation, and daily watering needs. It then covers how to select compatible pumping equipment, solar panels, controllers, cables, pipes, filters, and storage tanks according to the required flow rate and available sunlight. Proper planning helps ensure that the system is efficient, reliable, and suitable for the irrigation area.

The installation process includes positioning the solar array, securing the pump, connecting pipes, and configuring the control system. After installation, users can organize water storage and divide the land into practical irrigation zones to manage flow effectively. The system should be tested for leaks, pressure, water delivery, and controller performance. Regular maintenance, including cleaning panels, checking connections, inspecting filters, and monitoring pump operation, will help maintain consistent performance over time.

Henry

Henry

Henry is a dedicated marketing professional with a profound expertise in the company's offerings. With years of experience in the industry, he possesses an impressive understanding of the market dynamics and consumer behaviors that drive success. Henry is committed to sharing his insights through......