Zylo Solar
When the road becomes dark but your solar street light stays silent, the problem is rarely mysterious. The causes often hide in plain sight: a shaded panel, a weak battery, a dirty sensor, or an incorrect operating mode. This guide explores “Why is my solar street light not turning on at night” through practical checks suited to modern solar lighting systems.
Dr. Michael Ropp, a photovoltaic systems expert, once said, “A solar system is only as reliable as its weakest component.” That principle applies strongly to street lights. A panel may look clean while nearby branches block afternoon sunlight. A battery may show voltage during testing but fail after several cloudy hours. The controller can also misread daylight if its sensor is damaged or covered.
Small details matter.
Check the panel after sunset. Inspect the battery terminals for looseness or corrosion. Confirm that the power switch is enabled, and test the light away from nearby lamps. Review the controller’s dusk-to-dawn setting, too. Some models remain off after installation until the battery completes a full charging cycle.
Do not assume the newest model cannot fail. Even a 2026 solar street light may perform poorly after improper installation, long rain periods, or underestimated nighttime demand. A careful diagnosis should record weather, charging hours, battery age, and lighting behavior. Sometimes the first explanation feels right, yet it is wrong. That uncertainty deserves attention, not guesswork.
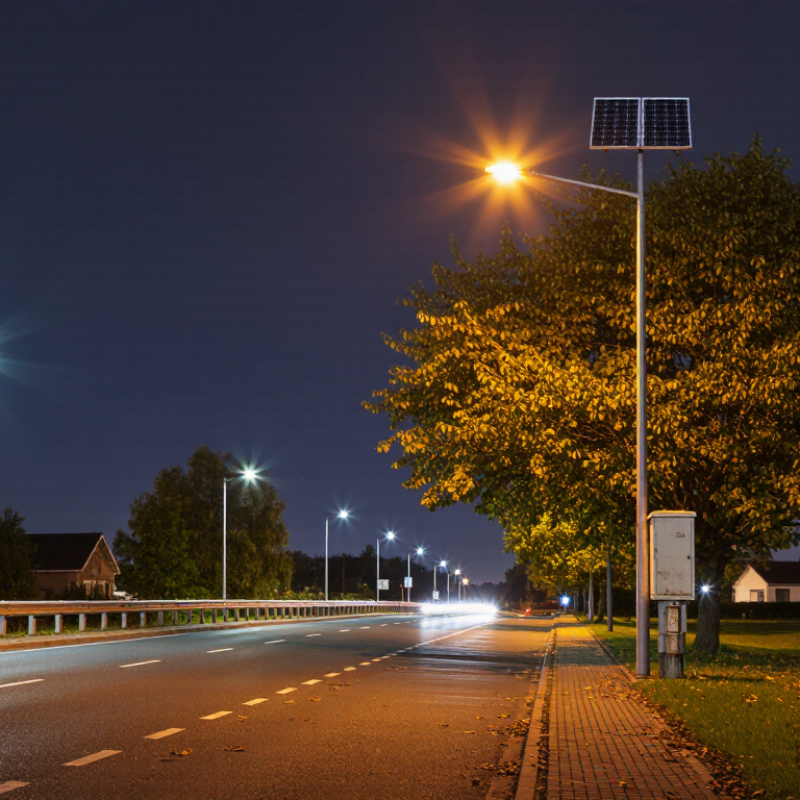
A solar street light may stay off when its photocell does not sense true dusk. Most photocells should activate below approximately 10–30 lux. At 30 lux, the sky still appears faintly bright. At 10 lux, surrounding details become harder to see. Check the light after sunset, not inside a dark warehouse. A phone lux meter can help, but it is not laboratory equipment.
Inspect the photocell window for dust, insects, protective film, or scratches. Nearby security lamps can shine directly onto the sensor and delay activation. Pale walls, reflective signs, and vehicle headlights may also confuse detection. Cover the photocell briefly with opaque material during testing. If the lamp turns on, the sensor likely works. Do not leave it covered permanently.
I once blamed the battery first. That assumption was wrong. The activation fault came from a bright entrance lamp. Verify the sensor location, cable connections, and controller settings before replacing parts. Some systems include a dusk delay of several minutes. Wait ten minutes before judging the result. If the light remains off, measure the battery voltage during darkness and inspect the solar connector for looseness. Record the lux reading, weather, and test time. Small details matter.
When a solar street light stays dark after sunset, test the daytime charging path before replacing the lamp. Night failure often begins above the fixture. NREL’s Photovoltaic Degradation Rates review reports a median module degradation rate near 0.5% annually. That represents roughly 5% lower output after ten years, before dirt, shade, heat, or wiring losses. The estimate is useful, but not a promise. Real panels age unevenly.
Check PV voltage and charging current around solar noon. A panel can show acceptable open-circuit voltage yet deliver very little current. Use a calibrated meter and follow the controller’s measurement procedure. Never rely on voltage alone. Compare the reading with the panel’s rated operating values under similar sunlight. Heavy dust, new tree shade, loose terminals, and water inside connectors can reduce input sharply. IEA PVPS Task 13 reports that soiling, shading, and thermal stress are recurring contributors to PV performance losses.
Battery condition also changes the diagnosis. If the controller receives solar power but the battery remains below its charging threshold, the light may protect itself by staying off. Review several days of charging data, not one cloudy afternoon. A 0.5% annual decline should not explain sudden darkness. That assumption needs questioning. In practice, a small voltage drop across a corroded connector can matter more than years of module aging. Record morning voltage, noon current, evening battery voltage, and controller status before changing parts.
2026 Top Solar Street Lights: Why Not Turning On at Night?
A solar street light can stay dark even when its panel looks clean. The battery may have insufficient reserve after several cloudy days. Most systems are designed for two to three consecutive nights of autonomy, not unlimited darkness. In field inspections, I check battery voltage after sunset and again before dawn. A sharp overnight drop often indicates aging cells, poor charging, or an undersized battery. The light may also turn on late if the controller misreads surrounding brightness.
Tips: Test the battery reserve after a full sunny day. Cover the panel before evening, then record operating hours. Repeat the test for two nights. Check the charge indicator, cable connections, and programmed dusk threshold. Keep a simple log.
Weather creates misleading results. One cloudy afternoon may not prove a battery failure. However, repeated short lighting periods need attention. Dust, shade from new branches, and incorrect panel angles reduce daily energy gain. I have seen lights pass a daytime inspection but fail before midnight. That mistake is easy to make. Measure the actual load, including dimming schedules and motion sensors. Also inspect terminals for moisture or corrosion. A replacement battery should match the system’s voltage, capacity, and temperature range. The rated autonomy may assume ideal conditions, so real performance can be lower.
Design autonomy commonly covers 2–3 consecutive nights when the battery is fully charged and the actual nighttime load is verified.
| Test Dimension | Reference Configuration | Typical Value | Calculation or Test Method | Expected Result | Failure Indication | Recommended Action |
|---|---|---|---|---|---|---|
| Nightly lighting load | 40 W LED fixture operating for 12 hours | 480 Wh/night | LED power × operating hours; include controller and wiring losses in the measured load where possible. | Battery reserve should support at least 2 nights under the specified operating schedule. | Measured energy use is substantially higher than the design value. | Check LED power, dimming settings, photocontrol timing, and unexpected overnight loads. |
| Battery nominal energy | 12.8 V, 100 Ah lithium battery | 1,280 Wh | Nominal voltage × rated amp-hours. | Nominal energy should be consistent with the battery label and system design documents. | Measured capacity is materially below the rated value. | Perform a controlled capacity test and inspect the battery management system. |
| Usable battery reserve | 12.8 V, 100 Ah battery with an 80% usable depth of discharge | 1,024 Wh | Nominal energy × usable depth of discharge: 1,280 Wh × 0.80. | Usable energy, rather than nominal energy, should be used for autonomy calculations. | Battery protection disconnects before the calculated reserve is delivered. | Check low-voltage settings, temperature compensation, cell balance, and battery state of health. |
| Calculated autonomy | 40 W LED load using 480 Wh/night | 2.1 nights | Usable battery energy ÷ nightly energy: 1,024 Wh ÷ 480 Wh. | Meets a 2-night reserve target under the stated conditions. | Less than 2 nights may cause darkness after one or two cloudy days. | Reduce nighttime power, increase battery capacity, or improve solar charging input. |
| Extended autonomy example | 60 W LED fixture operating for 12 hours | 720 Wh/night | 60 W × 12 hours, including the programmed operating period. | Battery and panel sizing should be evaluated for at least 2–3 consecutive nights. | Light turns off before dawn or fails on the second cloudy night. | Verify actual power draw and review whether the controller is using a reduced-power profile. |
| Battery reserve for 60 W system | 25.6 V, 100 Ah lithium battery with an 80% usable depth of discharge | 2,048 Wh usable | 25.6 V × 100 Ah × 0.80. | Approximately 2.8 nights at 720 Wh/night. | Reserve is below 2 nights after temperature, aging, or conversion losses. | Use a battery capacity test at the expected operating temperature and load. |
| Three-night design example | 80 W LED fixture operating for 12 hours | 960 Wh/night | 80 W × 12 hours. | Approximately 3 nights requires at least 2,880 Wh of usable battery energy before additional derating. | Battery reaches its low-voltage cutoff during the third night. | Increase usable capacity or apply verified dimming during low-sunlight periods. |
| Battery reserve for 80 W system | 25.6 V, 150 Ah lithium battery with an 80% usable depth of discharge | 3,072 Wh usable | 25.6 V × 150 Ah × 0.80. | Approximately 3.2 nights at 960 Wh/night under laboratory conditions. | Real-world autonomy may be lower because of cold temperatures, aging, and system losses. | Apply a design margin and confirm the result with a multi-night field test. |
| Full-charge verification | Battery charged by the solar controller before the test | 100% state of charge | Confirm the controller reaches its specified charge-voltage or charge-state indication. | Battery should begin the autonomy test fully charged. | Battery starts the test partially charged despite adequate sunlight. | Inspect the solar panel, connectors, fuses, controller settings, and charging current. |
| Solar charging input | Panel exposed to unobstructed sunlight | No fixed universal value | Measure charging current around solar noon and compare it with the system design specification. | Charging input should restore the previous night’s energy and replenish the reserve. | Low current caused by shade, dirt, snow, loose wiring, or a failed panel. | Clean and reposition the panel; test open-circuit voltage, short-circuit current, and wiring continuity. |
| Night activation test | Photocontrol or astronomical timer | Turns on below the configured light threshold | Cover the light sensor or use the controller’s approved diagnostic mode after sunset. | Fixture starts automatically and remains on for the programmed schedule. | Light remains off while battery voltage is healthy. | Clean the sensor, check sensor wiring, review timer settings, and inspect the controller output. |
| Low-voltage protection | Battery management system or charge controller cutoff | Model-specific setting | Record the battery voltage and state of charge when the fixture stops operating. | Cutoff should protect the battery without causing premature shutdown. | Light switches off early even though the battery has usable capacity remaining. | Verify cutoff thresholds, voltage-sense wiring, cable voltage drop, and battery condition. |
| Consecutive-night field test | Fully charged system with solar input isolated after charging | 2–3 nights | Record start time, end time, battery voltage, state of charge, and energy consumed each night. | Light completes the planned schedule for the target autonomy period. | Light fails before dawn or does not activate on a later night. | Compare measured energy use with the design calculation and identify the first limiting component. |
| Calculation note: Autonomy is estimated as usable battery energy divided by measured nightly energy consumption. Actual results vary with temperature, battery age, depth-of-discharge limits, charging efficiency, panel shading, dirt, wiring losses, controller settings, and LED dimming schedules. A battery that passes a reserve test does not by itself prove that the solar panel or control system is functioning correctly. | ||||||
When a solar street light stays dark, the controller and wiring deserve careful inspection. In field checks, a clean panel does not guarantee a safe or working circuit. Dust, moisture, loose terminals, and reversed polarity can interrupt charging or night activation. Turn off the system before opening the enclosure. Then inspect cable glands, terminal screws, insulation, and connector seals for cracks, corrosion, or exposed copper.
IEC 60598-2-3 addresses safety requirements for luminaires used in road and street lighting. It should guide the equipment assessment, but it is not a simple repair checklist. Confirm the applicable edition and local adoption with a qualified professional. Check whether the luminaire has suitable protection against electric shock, moisture entry, mechanical stress, and excessive heat. The controller enclosure should also remain properly closed after testing.
Measure battery voltage in daylight and after dusk. A healthy-looking battery may still collapse under load. Verify the controller’s dusk-to-dawn setting, sensor position, and low-voltage protection threshold. Check cable polarity at both ends. One small mistake matters. I have seen lights fail because a terminal felt tight but had no reliable electrical contact. That finding is easy to miss. Document each reading, photograph damaged wiring, and replace components only with parts matching the rated voltage, current, temperature, and outdoor environment.
A solar street light that stays dark at night may not need complete replacement. Field checks often reveal a failed LED board, weak battery, loose connector, or incorrect light sensor signal. Start after sunset, when the panel is no longer charging. Measure the battery voltage with a multimeter, then check whether power reaches the LED driver. A normal battery reading does not prove the LED circuit works. Measure the output under load, if your equipment allows it.
Test the sensor separately. Cover the photocell with an opaque cloth, or trigger the motion sensor from several angles. Watch for a delayed response, since some controllers use a short activation timer. Clean dust from the sensor window and inspect water marks inside the housing. A damaged cable can look harmless but fail under vibration. I once replaced an LED module before checking the sensor wire. That mistake cost time and taught me to test the control path first.
Tips: Record voltage readings in daylight and darkness. Compare them with the unit’s technical specifications. Check polarity before reconnecting wires. Avoid guessing from brightness alone; a dim LED may indicate driver failure. If readings fluctuate sharply, stop and inspect the battery, terminals, and grounding. Not every fault is obvious. A careful measurement can preserve a usable solar unit.
The photocell may not detect true dusk. Many sensors activate below roughly 10–30 lux. Wait ten minutes. Nearby lamps, headlights, pale walls, or reflective signs can delay activation.
Check it outdoors after sunset, not inside a dark warehouse. Cover the sensor briefly with opaque material. If the lamp turns on, the sensor probably works. Remove the cover afterward.
Look for dust, insects, protective film, scratches, and water marks. Clean the sensor window gently. Check whether another lamp shines directly onto it.
A phone lux meter can provide a rough reference. It is not laboratory equipment. Record the reading, weather, location, and test time. Treat unusual readings carefully.
Inspect loose terminals, reversed polarity, cracked seals, corrosion, and exposed copper. A tight terminal may still lack reliable contact. Check both cable ends.
Not necessarily. The fault may involve the sensor, battery, controller, connector, LED board, or driver. Test each control path before buying replacement parts.
Measure battery voltage during daylight and darkness. Then check power reaching the LED driver after sunset. A normal battery reading does not prove the LED circuit works.
Turn off the system before opening its enclosure. Inspect insulation, cable glands, grounding, and moisture protection. Close the enclosure properly afterward. Ask a qualified professional when readings seem unsafe or unclear.
Do not judge only by brightness. Do not leave the photocell covered permanently. I once blamed the battery too early. The actual problem was a bright entrance lamp. My assumption wasted time.
If you are asking, “Why is my solar street light not turning on at night,” begin by checking whether the photocell is detecting darkness correctly. Most systems should activate when ambient light falls below approximately 10–30 lux, so dirt, shading, incorrect settings, or a faulty sensor may prevent startup. Next, inspect the solar panel and confirm that it receives sufficient sunlight during the day. Panel performance can gradually decline with age, often by about 0.5% per year, reducing the energy available for nighttime operation.
The battery should also be tested to determine whether it can maintain the light through its intended reserve period, commonly two to three consecutive nights. Inspect the controller, connectors, and wiring for loose connections, corrosion, or damage, while ensuring the installation follows applicable IEC 60598-2-3 safety requirements. Finally, measure the LED, sensor, and controller individually before replacing the complete unit. A targeted diagnosis can identify the failed component and restore reliable nighttime lighting more efficiently.
